Showing posts with label Daring Bakers. Show all posts

Saturday, 29 November 2008

Pat A Cake, Pat A Cake


Pat-a-cake, Pat-a-cake,
Baker's Man!
Bake me a Cake
As fast as you can!

Pat it, and prick it,
And mark it with D,
Put it in the oven
For the Daring Baker's and me!


Yes, its THAT time of the month again! Welcome to the November, 2008 Edition of The Daring Bakers! The once a month baking group that challenges itself to . . . once a month . . . stretch their baking skills and go beyond the limits of their comfort zone, baking a different, luscious and demanding creation each time. I've belonged to this lovely group for over a year now, and during that year I have seen myself bake some lovely things such as Baby Boston Cream Pies, Yule Logs, and even Pizza. (You may recall my All Day Breakfast Pizza from last month!) This month's challenge was no less delightful. Our hostess has been Dolores of Chronicles In Culinary Curiosity, and the recipe she chose to challenge us with was a delicious caramel cake by Shuna Fish Lydon of Eggbeater, with an optional challenge of Alice Medrich’s Golden Vanilla Bean Caramels.
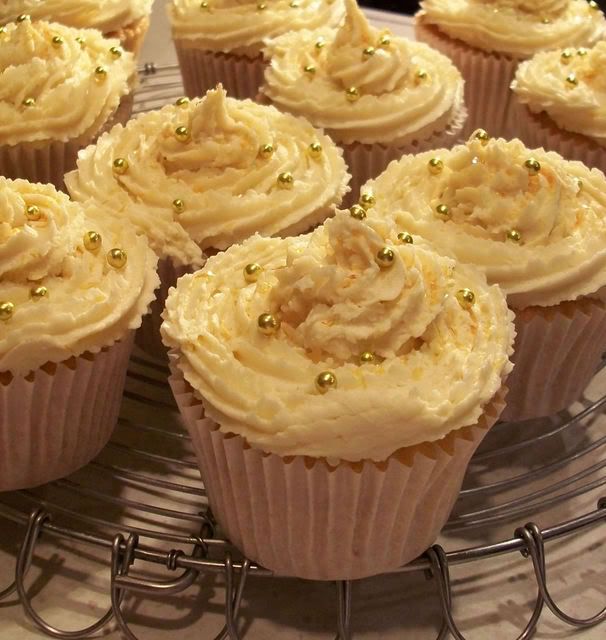


One of the first things we had to do in order to make this cake was to make our own caramel. Caramel has always scared me a bit. Anytime you are working with HOT sugar you should be a little bit afraid. Hot sugar sticks to the skin and really BURNS!! I still have visions of Home Economics back in Grade 10 when we were making divinity fudge and a pass of my spoon through the sugar mass, found my fingers getting a bit too close to the hot mixture and some getting caught between the end of my finger and my fingernail . . . an excruciatingly painful experience! You need to have a lot of respect for hot sugar syrup. But, that's not what scares me most about making caramel . . . it's the fact that it can turn from caramel to burnt sugar in a matter of seconds! I usually have to do it more than once, but I'm happy to say that this time I managed it in one try!
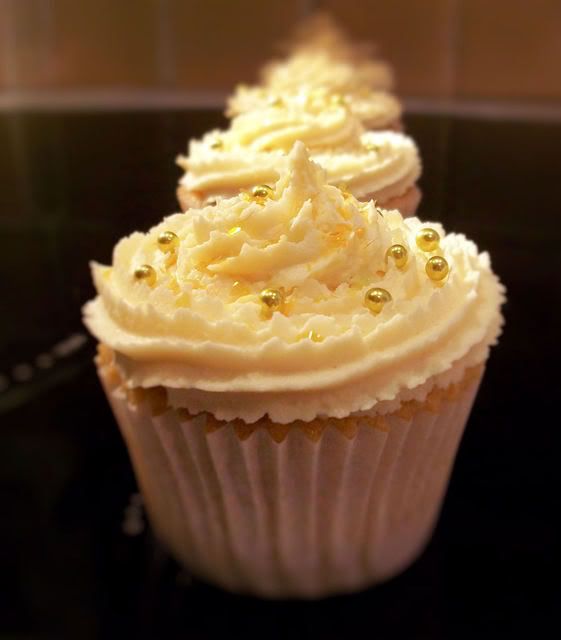


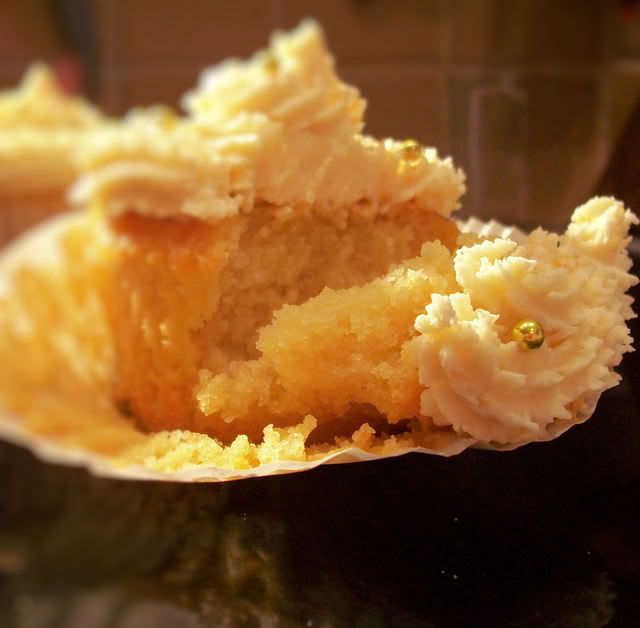
The cake itself was a bit of a doddle, as long as you had all your ingredients at room temperature. I decided at the outset that I was going to do cupcakes, and the recipe yielded 12 medium cupcakes, that took about 35 minutes to bake to a lovely golden brown.

The icing was really different. It required browned butter. I'm a bit of an expert at burning butter, but browning butter I had not really done . . . another step up on the learning curve.

I kept the burner on high under the butter, and kept a close watch on it the whole time. As soon as I saw the slightest hint of a brown colour appearing in one corner I turned the burner off and slowly swirled it over the heat until it was all evenly golden brown, and once that happened, I immediately removed it from the burner all together. I then strained it through a fine tea strainer and into a small bowl to cool.
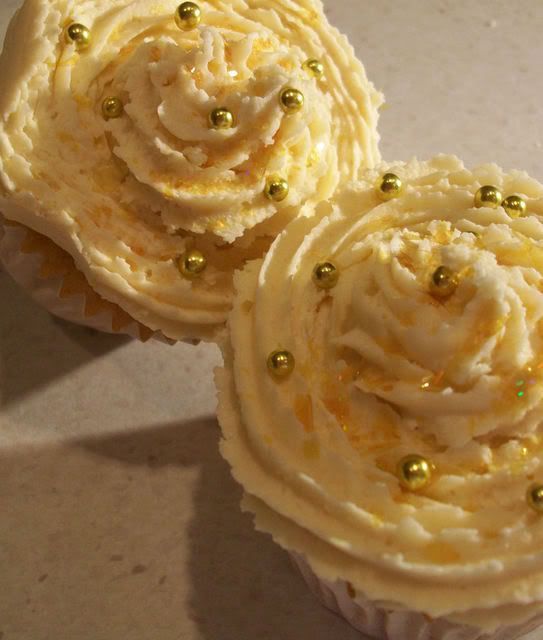


The icing went together like a dream and my . . . oh my . . .
D-E-L-I-C-I-O-U-S doesn't begin to describe it. This Caramelized Butter Frosting is to die for!!!

I piped the frosting on top of each cake, and then used some of my precious gold glitter and golden dragees to decorate the tops of each baby cake, giving them a wonderfully festive and glittery touch. (I had orignally thought to fill each one with some delicious Dulce De Leche, but will have to save that trick for another time. )
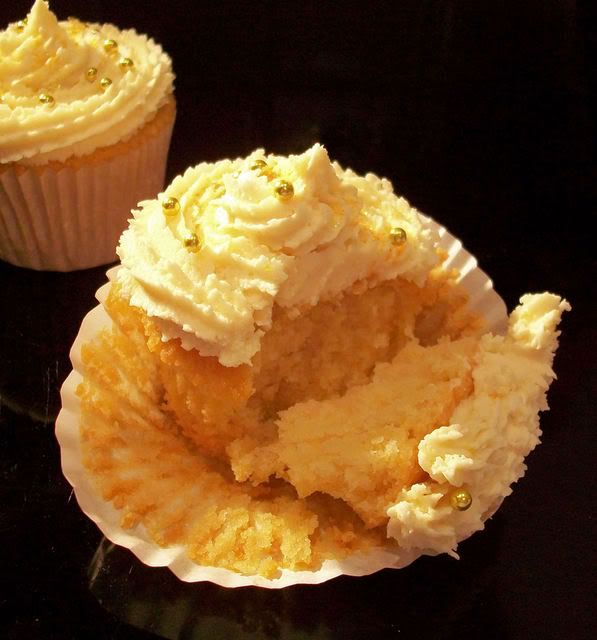


All in all, my cakes were a huge success and a delight to all who got to savour them! I managed to master several new baking techniques and had a lot of tasty fun in the process. That's what being a Daring Baker is all about after all, growing your skills and having fun along the way!

Be sure to check out DARING BAKERS BLOG ROLL to see all the other completed challenges! There's bound to be some really lovely creations. It always amazes me to see just how creative and innovative some of these lovely gals can be!


*CARAMEL CAKE WITH CARAMELIZED BUTTER FROSTING*

10 Tablespoons unsalted butter at room temperature
1 1/4 Cups granulated sugar
1/2 teaspoon kosher salt
1/3 Cup Caramel Syrup (see recipe below)
2 each eggs, at room temperature
splash vanilla extract
2 Cups all-purpose flour
1/2 teaspoon baking powder
1 cup milk, at room temperature

Preheat oven to 180*C/350*F. Butter one tall (2 – 2.5 inch deep) 9-inch cake pan.

In the bowl of a stand mixer fitted with a paddle attachment, cream butter until smooth. Add sugar and salt & cream until light and fluffy.Slowly pour room temperature caramel syrup into bowl. Scrape down bowl and increase speed. Add eggs/vanilla extract a little at a time, mixing well after each addition. Scrape down bowl again, beat mixture until light and uniform.Sift flour and baking powder.Turn mixer to lowest speed, and add one third of the dry ingredients. When incorporated, add half of the milk, a little at a time. Add another third of the dry ingredients, then the other half of the milk and finish with the dry ingredients. {This is called the dry, wet, dry, wet, dry method in cake making. It is often employed when there is a high proportion of liquid in the batter.}

Take off mixer and by hand, use a spatula to do a few last folds, making sure batter is uniform. Turn batter into prepared cake pan.Place cake pan on cookie sheet or 1/2 sheet pan. Set first timer for 30 minutes, rotate pan and set timer for another 15-20 minutes. Your own oven will set the pace. Bake until sides pull away from the pan and skewer inserted in middle comes out clean. Cool cake completely before icing it. Cake will keep for three days outside of the refrigerator.

*CARAMEL SYRUP*

2 cups sugar
1/2 cup water1
cup water (for "stopping" the caramelization process)

In a small stainless steel saucepan, with tall sides, mix water and sugar until mixture feels like wet sand. Brush down any stray sugar crystals with wet pastry brush. Turn on heat to highest flame. Cook until smoking slightly: dark amber.When color is achieved, very carefully pour in one cup of water. Caramel will jump and sputter about! It is very dangerous, so have long sleeves on and be prepared to step back.Whisk over medium heat until it has reduced slightly and feels sticky between two fingers. {Obviously wait for it to cool on a spoon before touching it.}**Note: For safety reasons, have ready a bowl of ice water to plunge your hands into if any caramel should land on your skin.

*CARAMELIZED BUTTER FROSTING*

12 tablespoons unsalted butter
1 pound confectioner’s sugar, sifted
4-6 tablespoons heavy cream
2 teaspoons vanilla extract
2-4 tablespoons caramel syrup
Kosher or sea salt to taste

Cook butter until brown. Pour through a fine meshed sieve into a heatproof bowl, set aside to cool.

Pour cooled brown butter into mixer bowl.In a stand mixer fitted with a paddle or whisk attachment, add confectioner's sugar a little at a time. When mixture looks too chunky to take any more, add a bit of cream and or caramel syrup.

Repeat until mixture looks smooth and all confectioner's sugar has been incorporated. Add salt to taste.

**Note: Caramelized butter frosting will keep in fridge for up to a month.To smooth out from cold, microwave a bit, then mix with paddle attachment until smooth and light

(recipes above courtesy of Shuna Fish Lydon)

I didn't get around to making these, but for those who are interested, here's the recipe for the Caramels:

*GOLDEN VANILLA BEAN CARAMELS*
- makes eighty-one 1-inch caramels -

Ingredients:
1 cup golden syrup
2 cups sugar
3/8 teaspoon fine sea salt
2 cups heavy cream
1 1/2 teaspoons pure ground vanilla beans, purchased or ground in a coffee or spice grinders, or 1 tablespoon plus 1 teaspoon pure vanilla extract
3 tablespoons unsalted butter, cut into chunks, softened

EquipmentA 9-inch square baking pan
Candy thermometer

Procedure:
Line the bottom and sides of the baking pan with aluminum foil and grease the foil. Combine the golden syrup, sugar, and salt in a heavy 3-quart saucepan and cook over medium heat, stirring with a silicone spatula or wooden spoon, until the mixture begins to simmer around the edges. Wash the sugar and syrup from the sides of the pan with a pastry brush dipped in water. Cover and cook for about 3 minutes. (Meanwhile, rinse the spatula or spoon before using it again later.)

Uncover the pan and wash down the sides once more. Attach the candy thermometer to the pan, without letting it touch the bottom of the pan, and cook, uncovered (without stirring) until the mixture reaches 305*F. Meanwhile, combine the cream and ground vanilla beans (not the extract) in a small saucepan and heat until tiny bubbles form around the edges of the pan. Turn off the heat and cover the pan to keep the cream hot.

When the sugar mixture reaches 305*F, turn off the heat and stir in the butter chunks. Gradually stir in the hot cream; it will bubble up and steam dramatically, so be careful. Turn the burner back on and adjust it so that the mixture boils energetically but not violently. Stir until any thickened syrup at the bottom of the pan is dissolved and the mixture is smooth. Continue to cook, stirring occasionally, to about 245*F. Then cook, stirring constantly, to 260°f for soft, chewy caramels or 265*F; for firmer chewy caramels.

Remove the pan from the heat and stir in the vanilla extract, if using it. Pour the caramel into the lined pan. Let set for 4 to 5 hours, or overnight until firm. Lift the pan liner from the pan and invert the sheet of caramel onto a sheet of parchment paper. Peel off the liner. Cut the caramels with an oiled knife. Wrap each caramel individually in wax paper or cellophane.

Variations:

Fleur de Sel Caramels: Extra salt, in the form of fleur de sel or another coarse flaked salt, brings out the flavor of the caramel and offers a little ying to the yang. Add an extra scant 1/4 teaspoon of coarse sea salt to the recipe. Or, to keep the salt crunchy, let the caramel cool and firm. Then sprinkle with two pinches of flaky salt and press it in. Invert, remove the pan liner, sprinkle with more salt. Then cut and wrap the caramels in wax paper or cellophane.

Nutmeg and Vanilla Bean Caramels: Add 1/2 teaspoon freshly grated nutmeg to the cream before you heat it.

Cardamom Caramels: Omit the vanilla. Add 1/2 teaspoon slightly crushed cardamom seeds (from about 15 cardamom pods) to the cream before heating it. Strain the cream when you add it to the caramel; discard the seeds.

Caramel Sauce: Stop cooking any caramel recipe or variation when it reaches 225°F or, for a sauce that thickens like hot fudge over ice cream, 228°F. Pour it into a sauceboat to serve or into a heatproof jar for storage. The sauce can be stored in the refrigerator for ages and reheated gently in the microwave or a saucepan just until hot and flowing before use. You can stir in rum or brandy to taste. If the sauce is too thick or stiff to serve over ice cream, it can always be thinned with a little water or cream. Or, if you like a sauce that thickens more over ice cream, simmer it for a few minutes longer.
(recipe from Alice Medrich's Pure Dessert)

Wednesday, 29 October 2008

I'm Not a Tosser!


Welcome to the October, 2008 Edition of the Daring Baker's Challenge of the month. It should come as no surprise to you that as well as being a "Dorie-ite," I am a "Daring Baker." A great many of us are one and the same. As a Daring Baker I am challenged each month to bake a glorious creation and stretch and hone my skills as a baker. It's a group that I love belonging to and have been able to bake thus far, several things I had not attempted before in my lifetime . . . luscious Yule Logs, Monster looking Potato Bread, Chocolate Coated Eclairs to name but a few.


This month's Daring Baker challenge comes to us today, via Rosa of Rosa's Yum Yum's. For this challenge she chose an easy to follow recipe for “Pizza Napoletana” from Peter Reinhart's “The Bread Baker's Apprentice” which yields a beautifully tasty, thin, crispy, yet chewy pizza crust.


One of the things she most wanted us to do was to learn how to toss a pizza. Oh, how I have always loved the sight of those wonderful Italian Pizza Chef's tossing their pizza's up into the air, and catching them . . . each toss of the dough yielding a larger, silkier creation, resulting in a perfectly round and flat piece of dough, just waiting to be baked into a delicious pizza, all stogged full of wonderful toppings and tasty Italian delights . . .


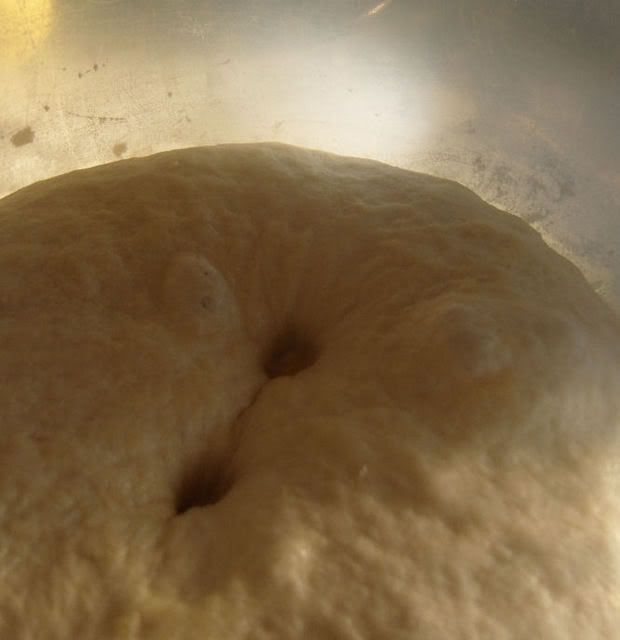
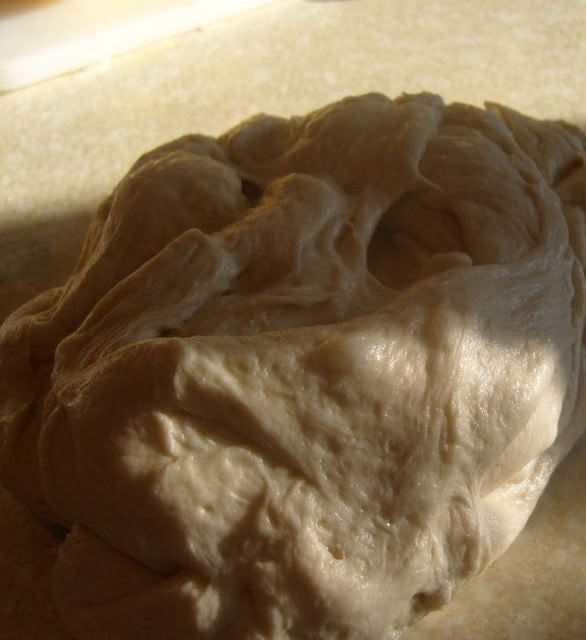
I am so not a Tosser, but I did try, I promise. No picture of me tossing I'm afraid. It was not a pretty sight! But there is a lovely picture of what I ended up with . . . it was not round . . . it was not flat . . . it was dough.

I ended up rolling it out in my normal way, with a rolling pin. It was a lovely dough though and went together quite well following the instructions for the recipe which may be found on Rosa's PAGE. Be warned though, you have to start the dough the day before you want the pizza.


I decided at the outset that I was going to make something quite different with my dough. I wanted something that would wow me and also my Todd.

Now, my Todd . . . he's got odd tastes, and he is soooo very British. He does not like foreign food and he's absolutely not a fan of anything Italian, and most especially not Pizza. (I know!!! He's nuts, hates chocolate and Italian food! Saints preserve us!!!)


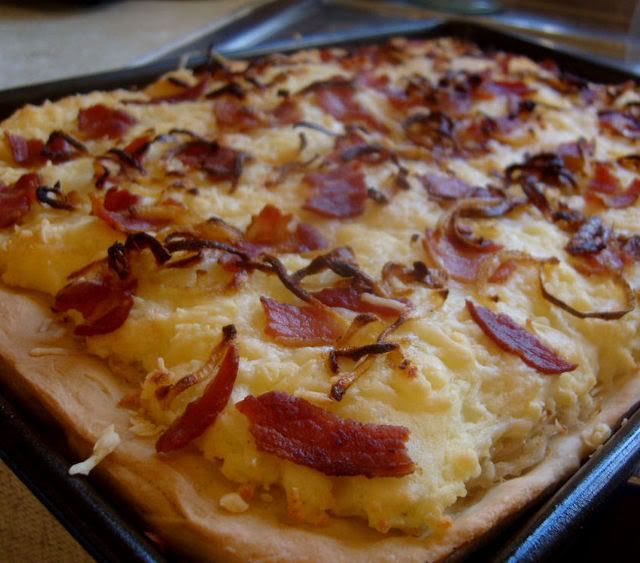
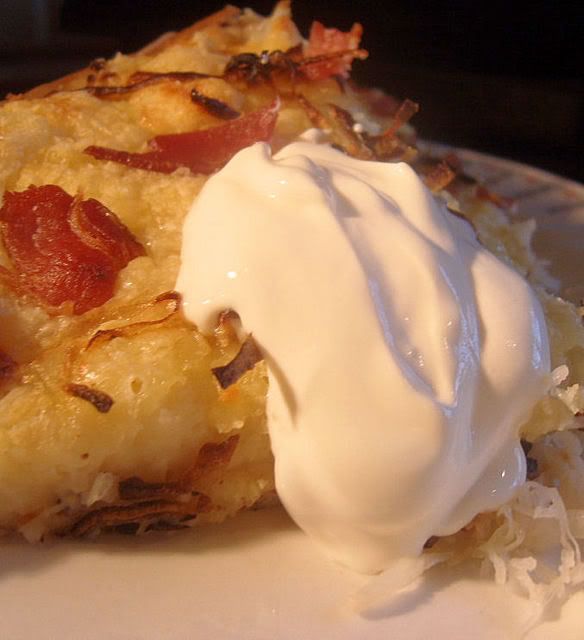
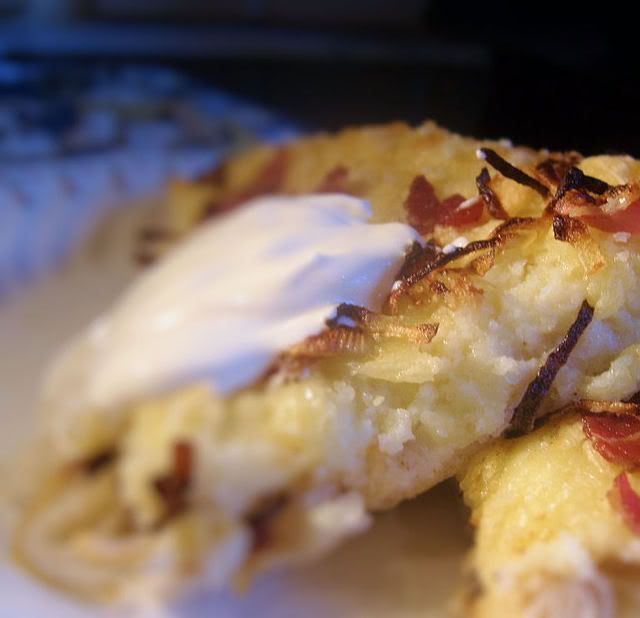
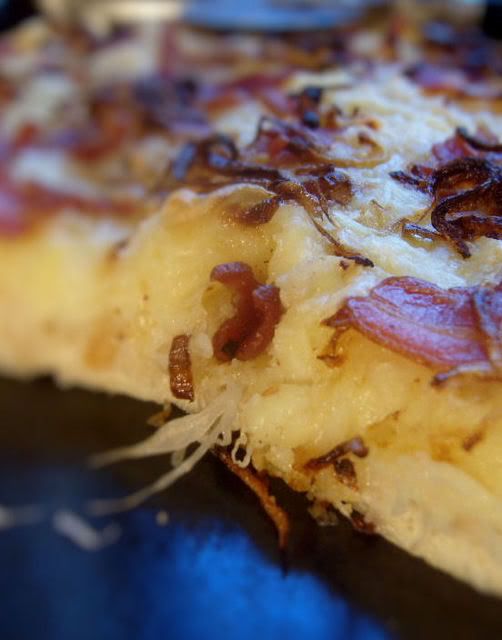
Mine I decided was going to be a *Pierogi Pizza.* I first got turned on to Pierogi's when I moved out to Winnipeg as a young Bride in the mid 1970's. Tasty little noodle like dumplings filled with a variety of fillings, but usually cheese and potato. Once boiled and drained, they are then fried . . . either deep fried in hot fat, or crisply browned in a pan full of melted and sizzling butter(my preference) and served up hot and garnished with lovely buttery fried onions and oodles sour cream. Diet food, NOT . . . Delicious . . . YES!

I spread out my dough and then pre-baked it for about 10 minutes. I always pre-bake my pizza doughs. I think it makes the bottoms crisper.


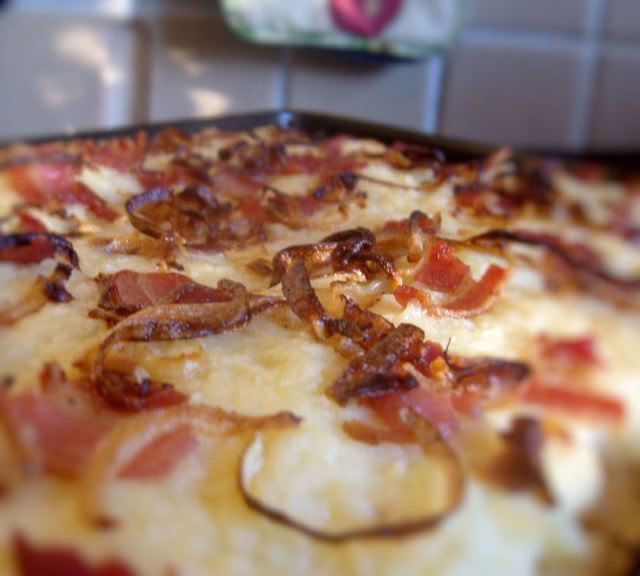
After the initial baking I topped the first one with 1/2 cup of well drained sauerkraut, and then about 2 cups of cheesy mashed potatoes. (Mashed potatoes that I had stirred a cup of grated strong cheddar cheese in until it melted and highly seasoned with salt and cracked black pepper) I patted the potatoes well down onto the sauerkraut to make sure it would all adhere. I then topped it with a mixture of mozzarella and gruyere cheeses, some crisply fried bacon bits and one whole onion that had been thinly sliced and fried in butter.


Ohh, can't you just feel the pounds piling on!!! This was soooo not diet food. This went into the oven and was baked for a further 20 minutes until the crust was golden brown and nicely crisp on the bottom.


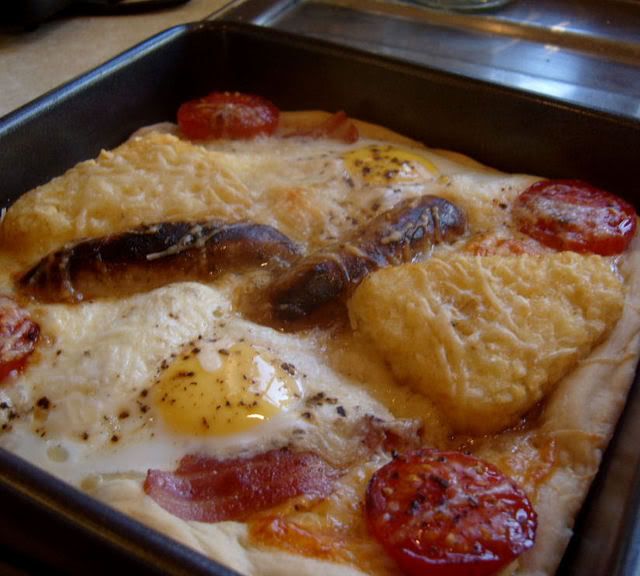
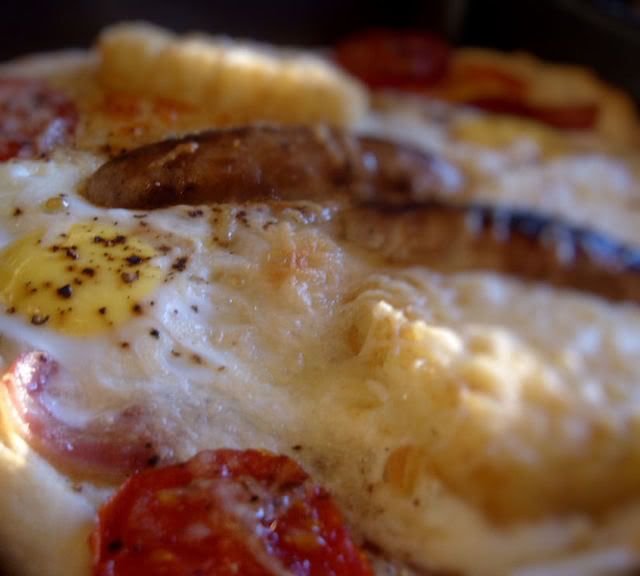
Todd's was an *All Day Breakfast Pizza.* I made his in a smaller pan so that I could make a nice deep edge on it to hold in all the filling. I also pre-baked it for several minutes. I then topped it with some grated cheddar cheese and grilled tomatoes, one for each corner. Then I added several rashers of cooked bacon, a couple of grilled sausages, some hash brown patties and two eggs, cracked in between all of that, with a final dusting of some gruyere cheese and some salt and cracked black pepper. I would have tried to get some baked beans in there, but there just wasn't any room!!!


This I baked for about 15 minutes or so until the crust was also nicely browned at the edges and the eggs were set. The eggs were actually a bit more done than I had anticipated so if I did it again I would bake it with everything else on it for a time, and only then crack on the eggs and bake it for only about 10 minutes to set them.


The verdict??? I thought my pizza was delicious, if rather heavy, and could only manage one tasty piece. Todd rather liked his, tucking in with great relish and eating the whole thing!

Would I make it again? Well, I think I'd rather stick to real pierogi's myself and leave Pizza to the Italians, topping it with loads of cheese, tomato sauce and pepperoni. As for Todd . . . well, he'd just rather leave pizza altogether . . . and does prefer his breakfast in the normal way, on a plate, not a disk of dough, although he said it wasn't bad as far as pizza's go . . .


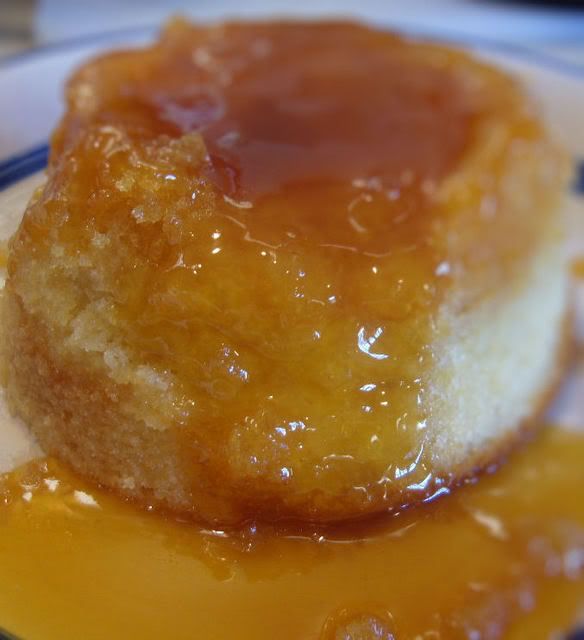
I did however redeem myself by cooking him a lovely Treacle Sponge, which you can find on my other Page, Marie Cooks Britain. (I know! I don't update that page near often enough!!!) Hop on over there for the recipe and another tale.

In the meantime, don't forget if you want to see the recipe for the pizza dough, to check out Rosa's page and if you want to check out what some of the other Daring Baker's have produced you can check out the Daring Baker's Blog Roll. I bet there are some really delicious creations to drool over!

Hmmm . . . I wonder what we'll be baking next month . . .

Saturday, 27 September 2008

Daring Bakers Challenge, Sept. 2008, Lavash Crackers and Toppings


I was really excited when I saw the challenge for this month for the Daring Bakers. First of all I am really proud and happy to be a member of this large group of dedicated bakers who come from all over the world. Each month we all bake the same recipe as chosen by a member of the group and some of them are really very challenging. In belonging to this group I have been able to make and experience such wonderful delights such as French Bread, Swiss ButterCream and Choux pastry to name but a few, all from scratch and I am happy to say that I've been able to master each one as it has been presented. I just love belonging to the group as it challenges me and allows me to stretch and grow in the field that is one of my great loves . . . baking!

This month as you can tell from the title we were challenged to bake some Lavash crackers with a variety of toppings. Not only that but this month we are making Daring Bakers history as our September challenge is vegan and/or gluten free. As you can imagine belong to a baking group such as this makes for some pretty great challenges for those of us who are vegetarians and allergic to gluten amongst other things, so this was really special that finally we have a recipe that caters to those of our members who face this challenge in their daily lives! This month's challenge was chosen by none other than Natalie from Gluten A Go Go, and co-host Shel, of Musings From the Fishbowl.


It was really nice to be baking something savoury for a change and I was just so pumped to make these crackers. I have always wanted to try making my own crackers and so this was great! We were also challenged to come up with a dip or spread to serve with the crackers that was also vegan and gluten free!

Whilst I am not a vegetarian, I do like to toy with the idea from time to time and I have to say in recent years Todd and I have been eating a lot less red meat, and if we are going to eat any meat at all, it is mostly chicken or fish.


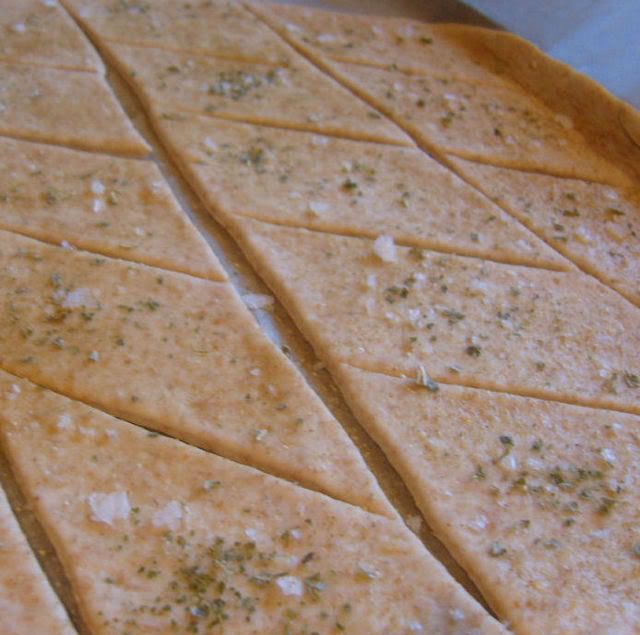
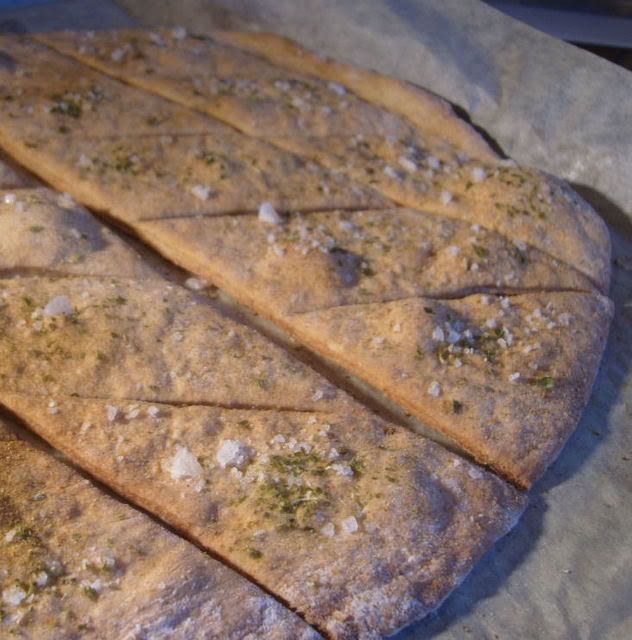
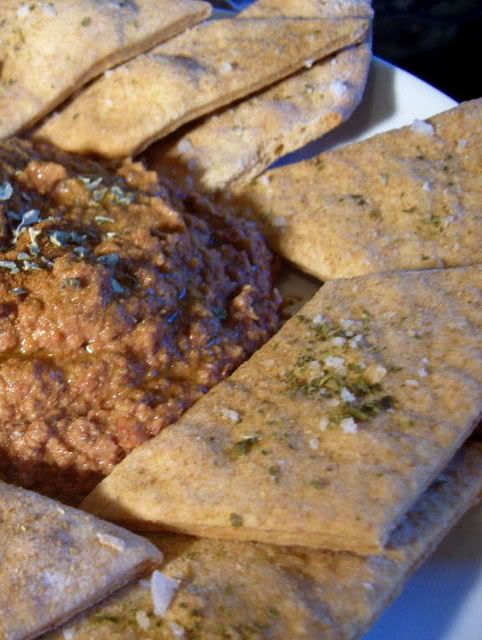
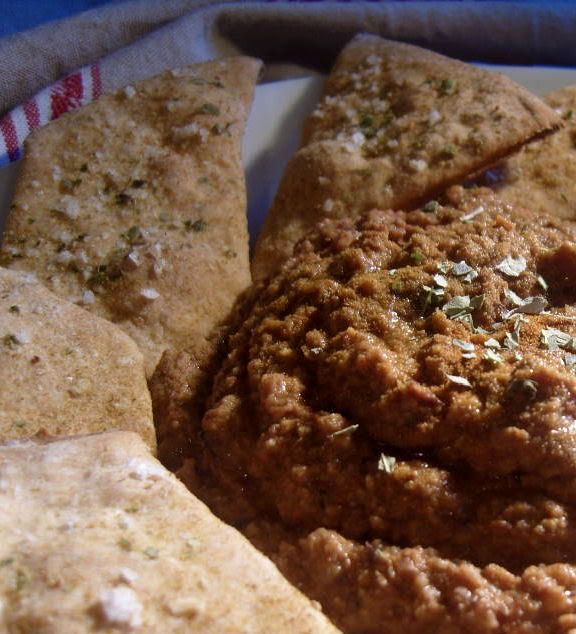
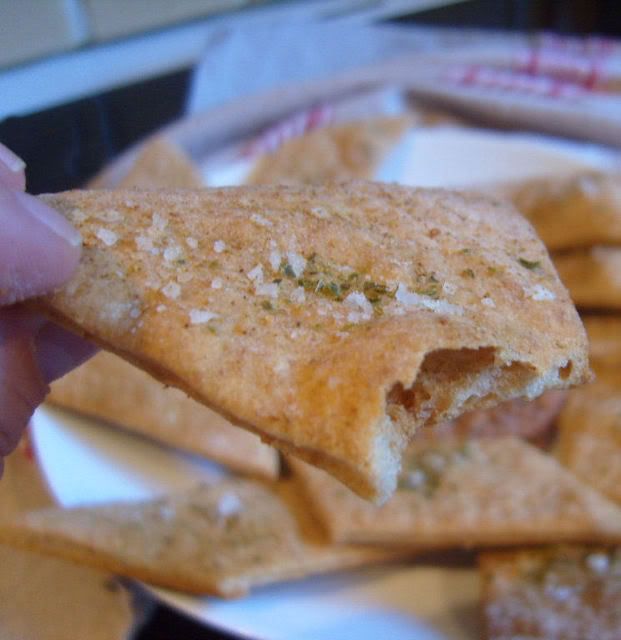
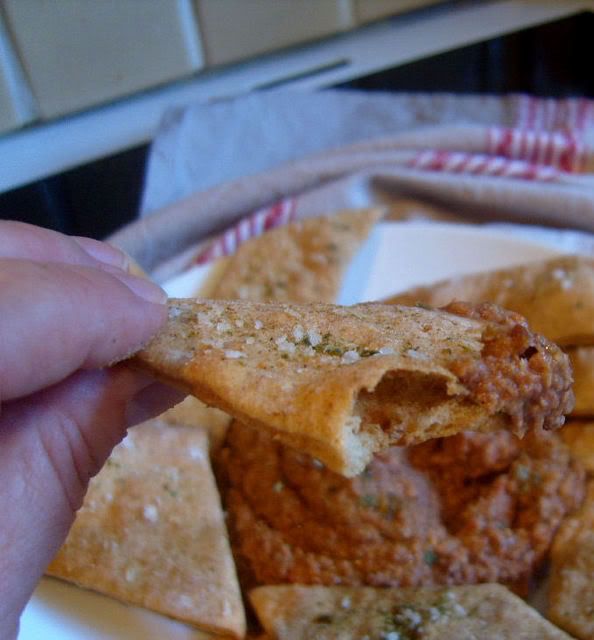
This was a very easy recipe to execute actually. In my quest to create something healthy and good for us, I decided that I would use a bit of whole wheat flour in the cracker dough. The hardest part came with the rolling it out. I tried to roll it as thin as possible, although after they came out of the oven I realized I should probably have tried to get them even a bit thinner. I brushed the tops lightly with some olive oil before baking them and scattered a mixture of sea salt, oregano, some cumin and garlic over top. They smelled incredible when they were baking.


To go along with the savoury toppings I decided before I even started that I wanted to make a type of hummus dip. I just love hummus. Hummus and some raw veggies have always been my favourite snack of choice (next to chocolate of course!) I love the roasted sweet potato hummus that you can get in Marks and Sparks and I just adore Lemon Coriander Hummus as well, not to mention Sun Dried Tomato and Roasted Red Pepper, but I wanted something with a distinctly Medditerranean feel to it, not to mention taste. I just love Kalamata Olives and Capers and so I decided that I would use them. Well, enough talk, see for yourself. This was delicious!


Many thanks to the other Daring Bakers for all the incredible presentations they make each month with their challenges and to Natalie and Shel for choosing this recipe. If you would like to see some of the other challenges feel free to drop onto the Daring Baker's Blog Roll and check them out!

Mmmm . . . I wonder what next month's challenge will be! I can't wait!


*Lavash Crackers*

Makes one baking tray

Based on the recipe from The BAker's Apprentice.

1 cup strong bread flour
1/2 cup strong whole wheat bread flour
1/2 tsp salt
1/2 tsp instant yeast
1 TBS agave syrup (or sugar)
1 TBS olive oil
1/2 cup, plus 2 TBS water, at room temperature
olive oil
Sea salt
Ground cumin
1 fat clove of garlic, peeled and minced
1 tsp dried oregano

Place the flours, salt, and yeast in a bowl. Mix together the syrup, olive oil and 1/2 cup of water. Pour this slowly into the flour mixture and stir it together to get a workable dough. Add only as much of the 2 TBS of water as needed. Turn out onto a lightly floured board and knead for 10 minutes, or until the dough is smooth and elastic. Place in a lightly oiled bowl, turning it to coat with the oil, then cover and allow to rest for 90 minutes, or until doubled in size.

Pre-heat the oven to 160*C/350*F. Line a large flat baking sheet with parchment paper and set aside.

Turn the dough out onto a lightly floured surface and roll out at thinly as you can, aiming for a rectangle roughly 15 inches by 12 inches. Carefully lift onto the parchment paper lined tray, cover and let rest for 5 minutes.

Using a pastry brush, lightly brush the top with a bit of olive oil, then sprinkle some sea salt, ground cumin, the garlic and the oregano as evenly over top as possible.

If you want, take a pizza cutter and make several cuts through the dough to the size of crackers you desire. If you prefer a more rustic look, just leave it as is and break it up into shards after baking.

Bake for 15 to 20 minutes, or until the crackers begin to brown evenly across the top. Allow the crackers to cool in the pan before snapping or breaking into shards to serve with your favourite spread or dip.


*Kalamata Hummus*
Serves 6

1 1/2 cups tinned chick peas, drained and rinsed well
1/4 cup tahini paste
2 fat cloves of garlic, peeled and crushed
the grated zest of 1 lemon
1/4 cup fresh lemon juice
3$ tsp cayenne pepper
2 - 3 TBS olive oil
3/4 cup pitted kalamata olives
2 TBS capers, drained and rinsed
1 small red pepper, seed and cut into chunks
3/4 tsp ground cumin
a small handful of fresh flat leaf parsley
To top:
1/4 tsp cayenne pepper
1/4 tsp ground cumin
1 TBS chopped fresh flat leaf parsley
a drizzle of extra virgin olive oil

Place all of the ingredients into a food processor and puree. If necessary add some cold water to adjust the consistency.

Spoon the hummus onto a serving plate. Dust the top with the cumin and cayenne pepper. Drizzle with a bit of olive oil and sprinkle on the pasrley.

Serve with your favourite cracker dippers, crisp pita breads or raw vegetable crudites.

Sunday, 31 August 2008

An August Daring Baker's Challenge


Do you know what day this is? Not only is it the 31st of August and a Sunday, but it is also the day I get to reveal to you, my darling readers, the Daring Baker's Challenge for this past month and how I did with it!

Yes, not only am I a Dorieite, but I'm also a Daring Baker . . . a member of that wonderful group of bakers that rise to a SINGULAR baking challenge each month and when I say challenge I truly mean challenge for it has presented me with some of my greatest baking challenges ever. With the Daring Bakers I have been able to face many of my baking fears and conquer some of them if not all.

I'm afraid due to work commitments, weddings and vacations I have been a very bad Daring Baker for the past several months, but I'm happy to say that I am back this month having conquered one of my all time fears, and successfully too, I might add! Yes, the dreaded Choux Pastry! Our challenge this month was chosen by MeetK and Tony Tahhan , who chose a lovely recipe Pierre Hermé from a cookbook written by Dorie Greenspan: Chocolate Desserts By Pierre Hermé . I have long wanted this cookbook, but sadly have never been able to procure a copy. Never mind, I have finally been able to bake something from it and SUCCESSFULLY! (Did I happen to mention that I conquered choux pastry!)


As some of you may know, Choux pastry is an enemy to me. Something that I have struggled with from the time I was a tentative teen up until just recently when I tried to make a Choux pastry ring for my other baking group. I was not looking forward to this challenge and, indeed, if I hadn't already missed three (count them one, two, three) Daring Baker's Challenges, I would have chosen to skip this one as well. But since I love the group and I had no desire to be booted out I rose to the challenge and am I glad I did, because I finally managed to make some Choux pastry SUCCESSFULLY! (you better get used to that word!)


I have to say that the recipe was a very good one and quite easy to follow, but then that's no surprise considering that Dorie wrote it, and as you know I am a fan of hers. Anyways, I followed it step by step meticulously as I didn't want yet another choux pastry failure under my belt. I'm happy to say that I did it! YES!! I did manage to make some eclair shapes SUCCESSFULLY!

This eclair recipe had three elements to it. First there was the choux pastry of course (SUCCESS) and then there was a chocolate pastry cream and a chocolate glaze. However we were given a bit of leeway in order to enable us to show some creativity with the recipe:

1. The dough used for the eclairs must be a pâte à choux from the given recipe.
2. Keep one chocolate element in the challenge. The recipe below is for a chocolate glaze and a chocolate pastry cream. You choose which chocolate element you want to keep. Then feel free to mix and match flavors to the base recipe.
3. Everything else is fair game. Enjoy!


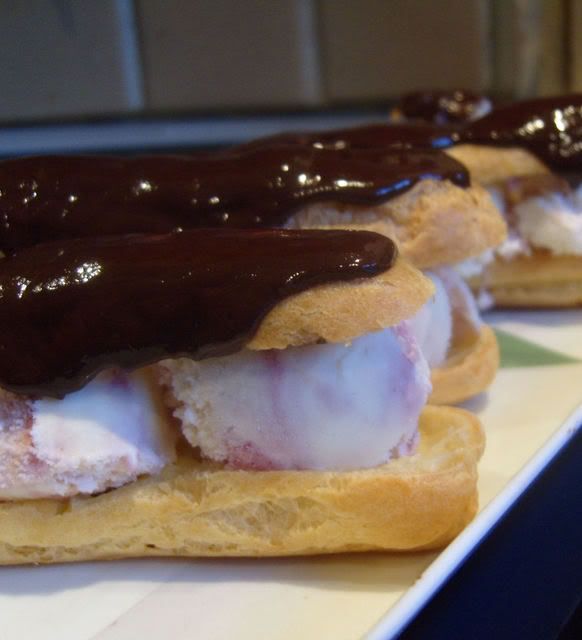
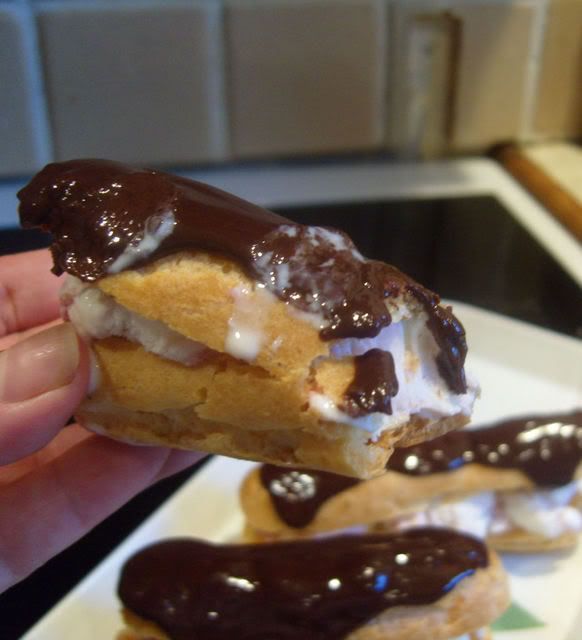
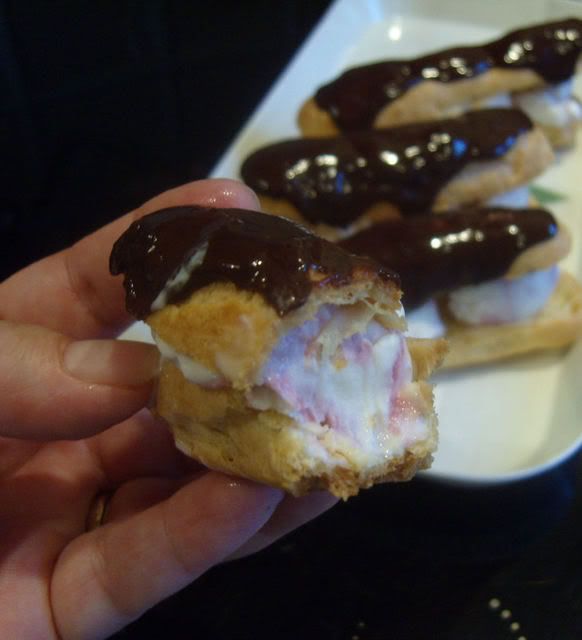
I chose to keep the chocolate glaze and decided that I would turn them into profiterole eclairs and use an ice cream filling instead of the chocolate pastry cream. I hope that this was ok and within the standards of the challenge, but let me tell you I was just so darned happy that I had managed the pastry that I couldn't think straight! (Not to mention time and me running out of it being a large factor!)

I had some delicious raspberry ripple ice cream leftover from one of my Dorie Challenges that I needed to use up so that was my filling of choice.


My chocolate glaze ended up being very shiny and I don't think it photographed very well for me, but that could be because I was not patient in waiting for it to set up.

The fabulous thing was that the making of these delicious delights coincided with the visit of my Visiting Teachers for the month so I was able to treat them, which they were quite happy with! Usually they feed my spirit and it was so nice for me to get to feed them for a change!


All in all I would have to say that I was quite happy with my results for this challenge, even if I did cop out and not make the pastry cream. I have always wanted to have a profiterole and never have so it was a first for me, and to have one that I baked myself and that was the size of an eclair . . . well . . . that was the icing on the cake for me! Oh, I do love a challenge and I do love belonging to this group. It enables me to stretch myself, and tread in places only Daring Bakers dare to tread!

Hop on over to the Blog Roll and see all the other delicious creations for the month! I am sure MeetaK will have the recipe posted on What's For Lunch Honey at some point today, but if not you can access it HERE !

Sunday, 30 March 2008

Let Them Eat Cake!!!


Oh heck!!! Is today the 30th of March??? What with Easter last weekend, and the time going ahead this weekend, I almost forgot! It IS! It IS!!! It's Daring Baker's Challenge day! It almost, but not quite, slipped my mind!


Oh what a delicious challenge we had this month too! This month's hostess Morven of Rosa's Yummy Yums chose the recipe Perfect Party Cake from Dorie Greenspan's book, Baking With Dorie. (One of my most favouritest baking books of all!)

This truly was a challenge to me this month. I had left it to the last minute and, to be perfectly honest, we have been really caked out this month. After all there IS only two of here living at Oak Cottage, but then again . . . at the same time . . . I had been really looking foward to making it and putting my own unique stamp on it. And so, with that in mind, yesterday morning I pulled out all my baking equipment, got my creative juices flowing, and got stuck in to the challenge.


Actually the whole thing was a bit of a dawdle to bake. Just a simple cake, and, with Dorie's expert instructions, I knew it couldn't fail! I was very impressed with the pristine whiteness of the batter and I do confess I was in bliss when I licked the beaters clean. (HEY! It's a cook's prerogative after all, not to mention I don't have any children around to fight me for them!)

I was a little bit nervous when I took the baked layers out of the oven though. They didn't look quite as high as I had supposed they would be! Never mind . . . I tipped them out of the pan and on to a rack to cool. (Right side up of course!) They smelled gorgeous! I could hardly wait for them to cool before I put my stamp on them.

The buttercream icing was also not hard, as I had already pretty much conquered my fear of that in December when we did the Yule log!

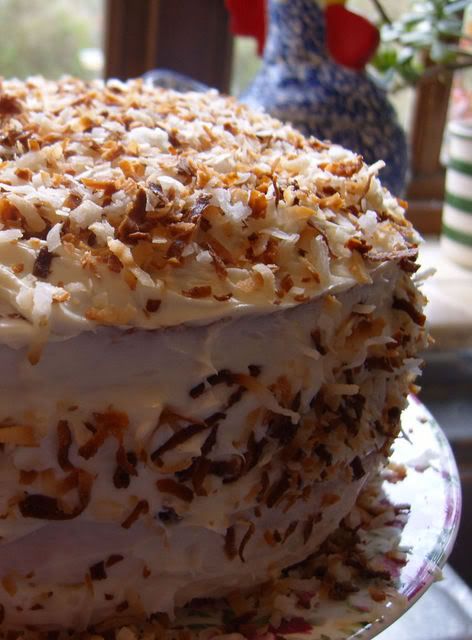
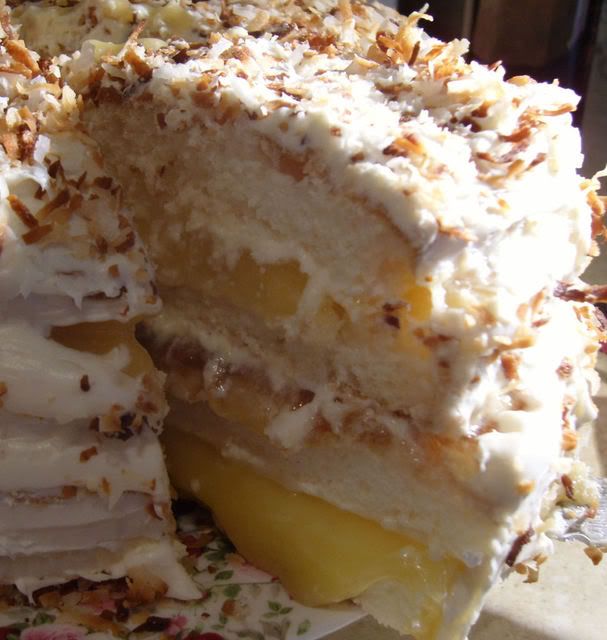
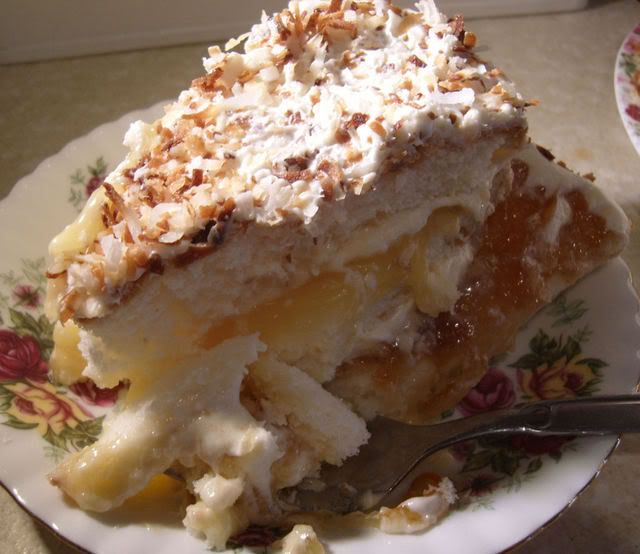
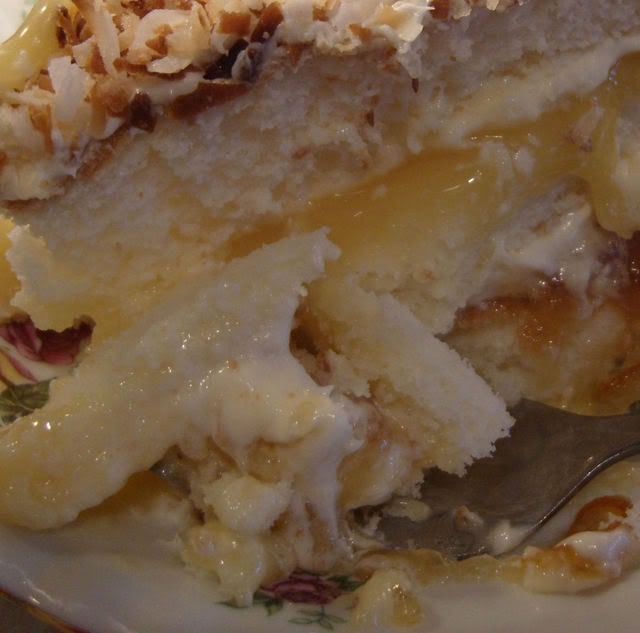
I had just made a Victorian sponge last weekend and so did not want to make yet another cake with raspberry jam in the filling, and so I decided to fill mine with my homemade Lemon Curd . I also thought a layer of Orange Marmalade would go nicely in the middle, and help to counteract the sweetness of the lemon curd. I then thought (I was inspired) . . . tropical and so toasted my coconut to sprinkle all over it!!!


The end result was definitely not flat! It was high and marvelous looking, although I do confess I put perhaps a bit too much buttercream on the insides and so was starting to run out a bit when it came to frosting the outsides with it! Thank goodness for toasted coconut, which hides a multitude of sins! All in all . . . I would consider this a delicious success . . . and Todd didn't argue that point at all. All I could hear from his corner of the room was . . . the scraping of a fork and snuffling grunts of pleasure!


PS - For those who have asked, the recipe is a hyperlink in the first paragraph underneath the first photo posted. Just click on the words Perfect Party Cake and they will whiz you over to the recipe, just like magic!

Friday, 29 February 2008

Let them eat "Bread"???


OK, so Marie Antoinette did not say "Let them eat Bread." As we all know she really said, "Let them eat Cake." But, in all honesty the word cake just didn't sound right for this month's Daring Baker Challenge, probably because I didn't bake one, even though I'd a ruther it had been cake.

I've certainly been challenged since joining the Daring Bakers several months back. I've made some pretty awesome, if not alien looking, potato bread, some fabulous Bostini Pies, a lovely Buche de Noel and a gorgeous Lemon Meringue Pie!!!

Cake . . . I can bake! Cookies and pies too! Biscuits are no problem for me either, but bread . . . it is my nemesis.

For years, I have tried and only produced tasty looking doorstops, which the many birds in our garden have more than enjoyed. My ex husband used to produce loaves and loaves of lovely fluffy white bread week after week, which was ardently gobbled down by the five kids, and oh yes, me too. It was lovely. Beautifully fluffy and tasty loaves. Well worth the mess he made when he made the kitchen table dance across the kitchen floor while kneading it.


When I found out this month that the challenge was yet another loaf of bread I was struck with fear. I so can not make bread, but I was determined to "rise" to the challenge. (Every pun intended!)

The Sour Dough's Mary and I Like to Cook's Sara were the host's of this month's Daring Baker challenge. The recipe, Julia's Child's French bread from the cookery book "Mastering the Art of French Cooking Volume 2".


My first problem came in reading the recipe which was posted online for all of us. My eyes just couldn't get around it for some reason. Not a problem though, because I work as a chef in a big house for a woman who is as cookbook obsessed as I am, if not worse(can it be possible???), I was able to find a copy of the book up there and photo copy the recipe (all umpteen pages of it) for myself and bring it home to study and work with.

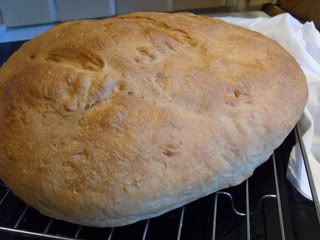
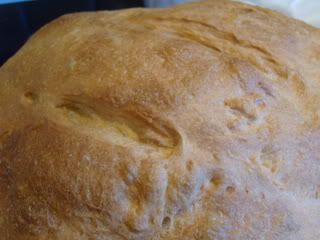
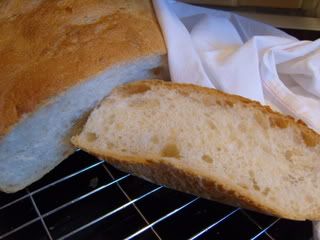
I didn't have pizza stones or baking boards and I was a bit daunted when I read the part about using them, but I plunged in head first anyways and made it to the best of my ability. I have a confession to make now and I am holding my hands up, I did use my bread machine to knead the dough, and for the initial rising. I know . . . the shame of it all. But it did work marvelously!


I really got a bit confused when reading the bits about the shaping and forming of the dough, and I have to confess that by that part I was getting quite tired and so, I confess again. I decided just to make a "Boule" or . . . the lazy woman's way *out* of having to shape French Bread. Besides I was a bit afraid that in moving the dough, which was rather nicely risen by that point, I would somehow destroy the *look* of it and so I shaped the boule onto some parchment paper on my baking sheet for the final rising.

I do have to say that it turned out rather well for this rather inept bread baker and we both really enjoyed eating it. I used the leftovers yesterday to make a rather delicious Meatball Sub Casserole yesterday for our tea, which you can find here on Maries Muses (my other blog) . And, if you are so inclined as to want to try this out for yourself, you can find the recipe for the French Bread in full on the Breadchick Mary's blog,The Sour Dough.


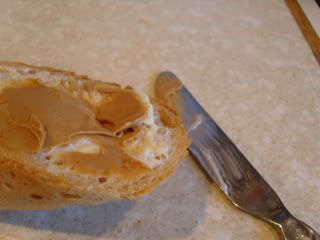
PSSTTT!!!! It was awfully delicious fresh from the oven and spread with some cold butter and peanut butter! (childhood memories kicking in here)

Oh . . . something else I learned this month. Upload your photos right away onto a photo saving site or your husband will think he is doing a good thing and clean up the desktop without telling you and get rid of your best photos. (Can you say "dead man"?) I'm sorry folks, this was all that was left and I only *just* rescued them because he hadn't emptied the garbage that I had left in the photo downloading folder. Phew!!! Oh the shame of it all!


PS - Aunt Fern's Coconut Cookies were the clear winner this week. Look for them real soon and in the meantime, time for another Make Me Bake poll.

Monday, 28 January 2008

I "HEART" Lemon Meringue Pie


From the time I could appreciate the niceties of life, Lemon Meringue Pie has been one of my most favouritest things! (Yes, I know, that's really not a word) I have fond memories of racing home from school at lunch time, absolutely starved, and discovering to my delight that my mother had made a delicious Lemon Meringue Pie for our dessert. Anything else on the menu paled in comparison. Served ice cold and sitting on our plates in lovely thick slices, it's delicious lemony filling all covered in a sticky, sweet mountain of lucious browned merigue, it was all we could do to wait until dessert to dig in. This was a real treat for us, as we usually only had dessert for special occasions. Mind you lemon pie made any occasion special in our books!


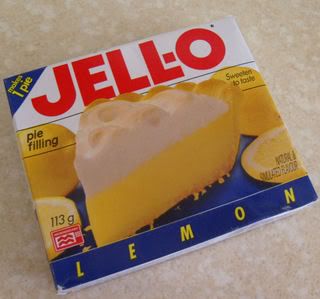
Until I became an adult and ventured out into the world, this was Lemon Meringue pie to me. Yes, I'm ashamed to say . . . it came in a box. This was the only kind my mother ever made. I didn't know there was any other kind. When she made it, it was a rare treat, and oh how I loved to be invited to scrape the pot clean when she was done! (A very rare occurence when you are one of three children vying for the honour!) My brother, being the youngest did not get his in a pie. My mother thought that pastry was too hard for a young stomach to digest, and so he got a bit of the filling mixed with some milk into a creamy pudding and served up in a little coloured melamine bowl.

As a young newly wed, I can remember making a Lemon Meringue Pie for my dear husband for the very first time. I was so proud of it . . . and so very dissappointed when, after one bite, he declared to me that this was not lemon meringue pie! What the heck???? His mother had always made her lemon pies from scratch and this was definitely not it! Thankfully, my mother in law was kind enough to write down all her recipes for me in a little pink flowered notebook, so I was soon able to produce a lemon pie for him that fulfilled his idea of what a Lemon Meringue Pie was, but sadly . . . it did not fit in with my recollections or fill my desires for a lemon pie. Her's , while nicely flavoured with lemon, was far too sweet for my tastes. There was none of that delightful lemony tang that I loved so much. It was back to the mixes for me, although I did make an occasional one like my mother in law's just to please the other half of the equation.

I was delighted this month to find out that the Daring Baker's Challenge for the month was Lemon Meringue Pie, but could it, would it, how could it possibly come even close to the one my mother used to create from that lovely little yellow and blue box?


As usual I left the challenge to the last minute. I kept buying lemons and then they would get used for something else . . . or I would be so busy at work that I didn't have enough time to spend at home to make one. Finally today I had the whole day to spend, and enough lemons in the house to do it, and so I got stuck in to the challenge. I have to say I am more than pleased with the results! This pie is fabulous! I'm not sure if this is an insult or not, but it is very close to the ones my mother used to make. Actually, if anything, it's even better!!! (and that is saying a lot!)

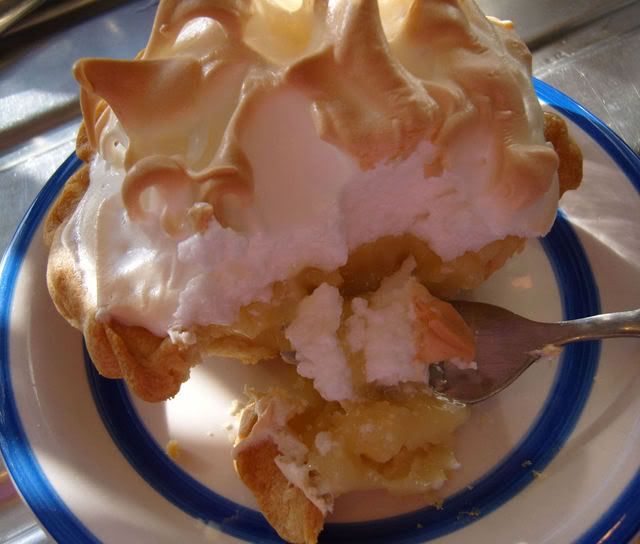
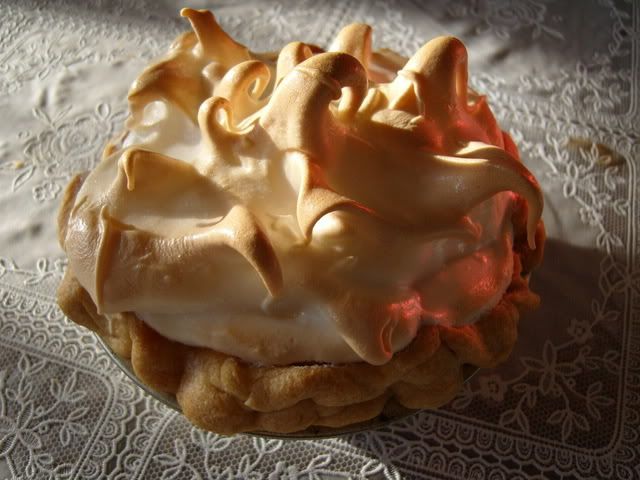
The recipe was very easy to follow and I really enjoyed making it. To be perfectly honest the glutton in me could not even wait for it to cool down before digging in to it's lucious lemon goodness! As you can clearly see I chose to make four individual pies. (In all truth each one was quite enough to satisfy two appetites as, I could barely get past half of the one I started and had to give it to Todd to finish)

Many thanks to Jen of The Canadian Baker for this most delicious and satisfying challenge. They say the proof is in the eating . . .


I think I'd rate this one a success! Thanks Jen for a most enjoyable way to spend a cold sunny day in January . One down, only three pies to go . . . now where's my fork?


*Lemon Meringue Pie*
from "Wanda's Pie in the Sky" by Wanda Beaver
Daring Bakers Challenge #15: January 2008
Makes one 10-inch (25 cm) pie or 6 tartlets

For the Crust:
175 grs - 3/4 cup (180 mL) cold butter; cut into ½-inch (1.2 cm) pieces
250 grs - 2 cups (475 mL) all-purpose flour
50 grs - 1/4 cup (60 mL) granulated sugar
1/4 tsp (1.2 mL) salt
1/3 cup (80 mL) ice water

For the Filling:
2 cups (475 mL) water
200 grs - 1 cup (240 mL) granulated sugar
60 grs - 1/2 cup (120 mL) cornstarch
5 egg yolks, beaten
60 grs - 1/4 cup (60 mL) butter
3/4 cup (180 mL) fresh lemon juice
1 tbsp (15 mL) lemon zest1 tsp (5 mL) vanilla extract

For the Meringue:
5 egg whites, room temperature
1/2 tsp (2.5 mL) cream of tartar
1/4 tsp (1.2 mL) salt1/2 tsp (2.5 mL) vanilla extract
150 grs - 3/4 cup (180 mL) granulated sugar

To Make the Crust:Make sure all ingredients are as cold as possible. Using a food processor or pastry cutter and a large bowl, combine the butter, flour, sugar and salt.Process or cut in until the mixture resembles coarse meal and begins to clump together. Sprinkle with water, let rest 30 seconds and then either process very briefly or cut in with about 15 strokes of the pastry cutter, just until the dough begins to stick together and come away from the sides of the bowl. Turn onto a lightly floured work surface and press together to form a disk. Wrap in plastic and chill for at least 20 minutes.Allow the dough to warm slightly to room temperature if it is too hard to roll. On a lightly floured board (or countertop) roll the disk to a thickness of 1/8 inch (.3 cm). Cut a circle about 2 inches (5 cm) larger than the pie plate and transfer the pastry into the plate by folding it in half or by rolling it onto the rolling pin. Turn the pastry under, leaving an edge that hangs over the plate about 1/2 inch (1.2 cm). Flute decoratively. Chill for 30 minutes.Preheat oven to 350ºF (180ºC). Line the crust with foil and fill with metal pie weights or dried beans. Bake for 20 to 25 minutes. Carefully remove the foil and continue baking for 10 to 15 minutes, until golden. Cool completely before filling.

To Make the Filling:Bring the water to a boil in a large, heavy saucepan. Remove from the heat and let rest 5 minutes. Whisk the sugar and cornstarch together. Add the mixture gradually to the hot water, whisking until completely incorporated. Return to the heat and cook over medium heat, whisking constantly until the mixture comes to a boil. The mixture will be very thick. Add about 1 cup (240 mL) of the hot mixture to the beaten egg yolks, whisking until smooth. Whisking vigorously, add the warmed yolks to the pot and continue cooking, stirring constantly, until mixture comes to a boil. Remove from the heat and stir in butter until incorporated. Add the lemon juice, zest and vanilla, stirring until combined. Pour into the prepared crust. Cover with plastic wrap to prevent a skin from forming on the surface, and cool to room temperature. (I confess, I did not do it this way. I brought the water to a boil in the kettle. I mixed the cornstarch and sugar together in a heavy bottomed saucepan. Once they were well mixed I whisked in the hot water, and then proceeded as stated in the rest of the recipe instructions)

To Make the Meringue:Preheat the oven to 375ºF (190ºC). Using an electric mixer beat the egg whites with the cream of tartar, salt and vanilla extract until soft peaks form. Add the sugar gradually, beating until it forms stiff, glossy peaks. Pile onto the cooled pie, bringing the meringue all the way over to the edge of the crust to seal it completely. Bake for 15 to 20 minutes, or until golden. Cool on a rack. Serve within 6 hours to avoid a soggy crust.